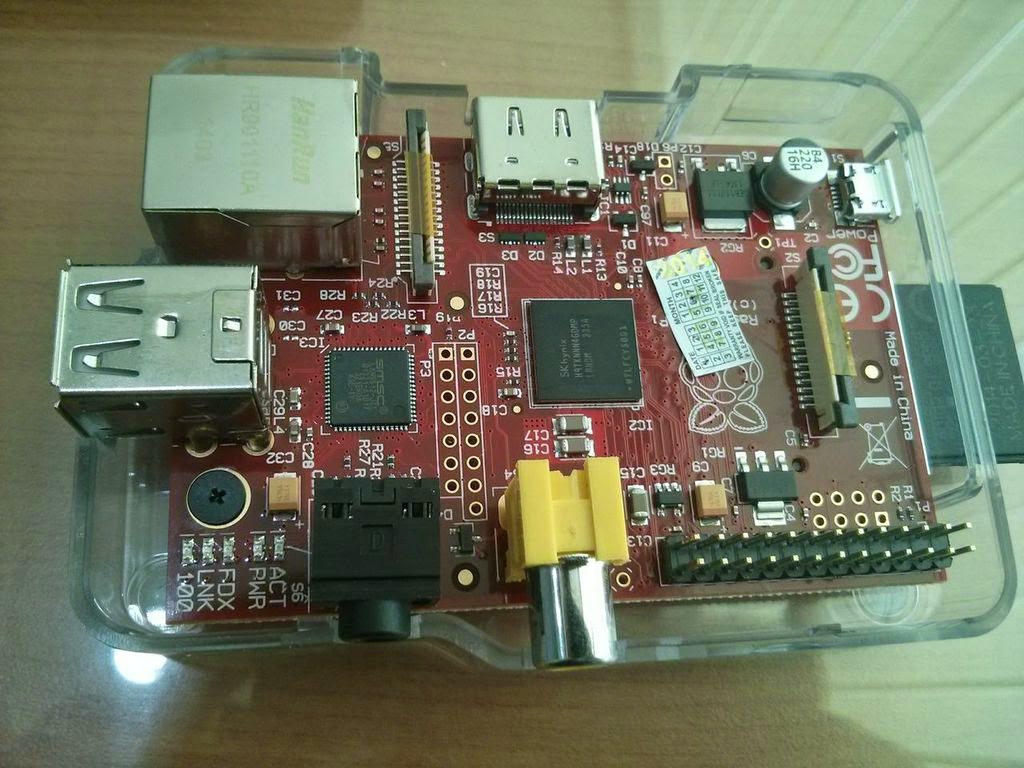
Mainan baru: Raspberry Pi model B
 |
| Raspberry Pi w/ sdcard |
Persiapan
Untuk melengkapi Raspberry Pi (raspi), dibutuhkan juga item-item ini:- Sdcard (8GB, raspbian butuh 3GB)
- Usb hub tanpa power (kuat untuk wifi, usb flash, remote)
- Charger usb 1000 mAh (untuk power up raspi)
- Wifi dongle (optional kalau pakai ethernet)
- PC Remote controller (remote kecil infrared colok ke usb)
- Keyboard+mouse combo wireless (optional)
- HDMI atau Tv out cable
Instalasi
- Download Raspbian
http://www.raspberrypi.org/downloads/ - Colok Sdcard ke laptop / sdcard writer
- Install image tersebut (1) ke sdcard (data akan hilang!!)
http://www.raspberrypi.org/documentation/installation/installing-images/README.md - Jalankan gparted untuk membuat partisi sisa nya
- Pindahkan sdcard ke raspi
- Colok kabel hdmi, keyboard+mouse wireless
- Colok charger usb/power
- Boot
http://www.raspberrypi.org/help/noobs-setup/
Remote dengan laptop
Cara lebih susah, bisa di skip kalau ada keyboard wireless- Colok kabel network ke laptop (straight kabel)
- Set static IP laptop (192.168.66.1)
- Jalankan dhcp server:
killall dnsmasq; ifconfig eth0 192.168.66.1; dnsmasq -i eth0 -F 192.168.66.20,192.168.66.250 -p0 -O option:dns-server,8.8.8.8,8.8.4.4 -O option:router,192.168.66.1 - tailf /var/log/syslog
Tunggu beberapa saat, nanti raspi akan dapat IP, scan dengan nmap -sP 192.168.66.0/24 - ssh ke IP tersebut,
username: pi password: raspberry
Update OS
- ssh ke raspi
- sudo su
- apt-get update
- apt-get upgrade
- apt-get autoclean
- rpi-update
(untuk update firmware) - raspi-config
(untuk tuneup alokasi memory CPU vs GPU, set 256MB untuk menjalankan xbmc) - reboot
Setting wireless
- Edit langsung /etc/wpa_supplicant/wpa_supplicant.conf
- atau pakai wpa_gui dari X
- Supaya WiFi bisa reconnect kalau putus, tambahkan crontab root:
0 * * * * ifup wlan0
 |
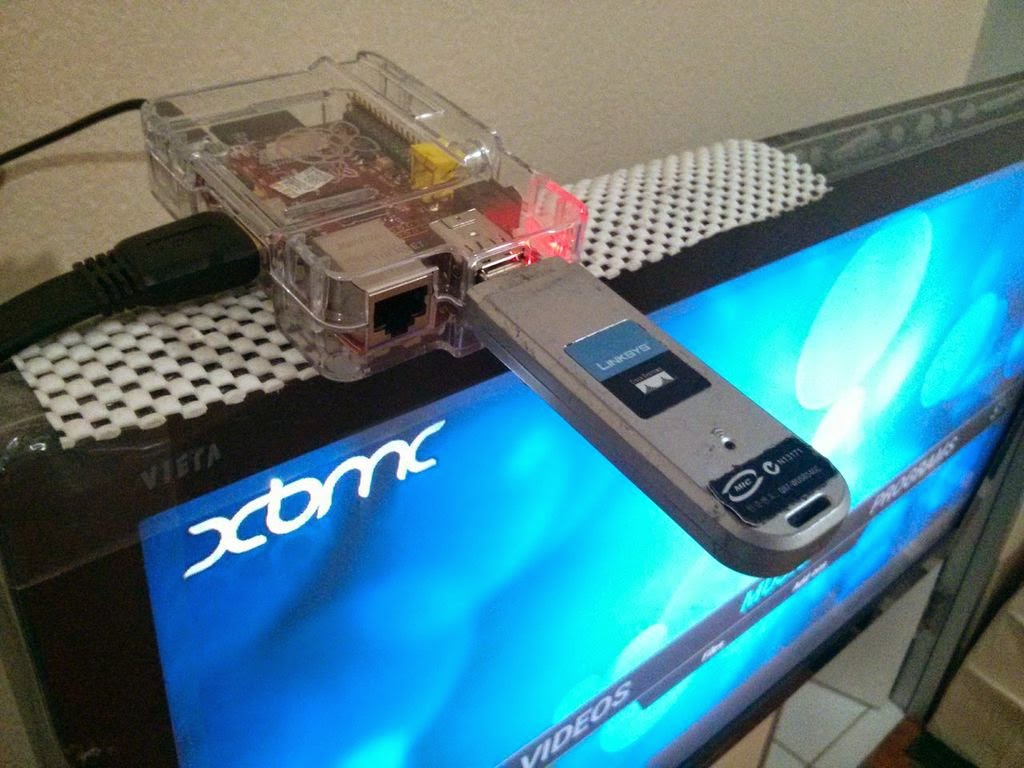
| Raspberry Pi connected to HDMI, running XBMC |
Instalasi XBMC
- Instalasi dari repo ini:
deb http://archive.mene.za.net/raspbian wheezy contrib
- Tutorial install xbmc:
http://michael.gorven.za.net/raspberrypi/xbmc Setup automount untuk usb flash
http://wiki.xbmc.org/index.php?title=Archive:HOW-TO:Install_XBMC_on_Ubuntu/HOW-TO_3#USB_Automount- Ternyata point 3 sudah otomatis kalau jalanin pakai xbmc-standalone
- Untuk control xbmc bisa menggunakan wireless keyboard atau remote (PC remote controlleR)
- Untuk customize mapping tombol di remote, buat di .xmbc/userdata/keymaps/keyboard.xml
<keymap>
<global>
<keyboard>
<one mod='ctrl,alt'>XBMC.ActivateWindow(MyMusic)</one>
<two mod='ctrl,alt'>XBMC.ActivateWindow(VideoLibrary,MovieTitles)</two>
<three mod='ctrl,alt'>XBMC.ActivateWindow(MyPictures)</three>
<four mod='ctrl,alt'>XBMC.ActivateWindow(VideoLibrary,Files)</four>
<o mod='ctrl'>ContextMenu</o>
<three mod='ctrl'>FullScreen</three>
<tab mod='alt'>XBMC.ActivateWindow(Home)</tab>
</keyboard>
</global>
</keymap>
 |
| Complete setup dengan remote, usb flash dan wifi |
Misc
- Bikin auto login ke user pi, ubah di inittab menjadi:
1:2345:respawn:/bin/login -f pi tty1 </dev/tty1 >/dev/tty1 2>&1
http://elinux.org/RPi_Debian_Auto_Login - Auto run shell script, tambahin bagian bawah /home/pi/.bashrc, misalnya:
/home/pi/start.sh
#!/bin/sh
if [ -f /run/lock/started ]; then
exit
fi
touch /run/lock/started
while true; do
dialog --title "Raspberry Pi" --menu "Hello, what do you want to do? Apa yang ingin anda lakukan?" 12 40 8 xbmc "Play Movie or Music" startx "Run Linux desktop" console "Go to console" 2> /tmp/091ac566-67aa-4d74-948d-dacb8fa82036
choice=$(cat /tmp/091ac566-67aa-4d74-948d-dacb8fa82036)
clear
case $choice in
xbmc)
echo "Starting xbmc:"
FB_GEOMETRY="$(fbset --show | grep geometry | cut -d' ' -f 6-)"
xbmc
chvt 3
fbset --geometry $FB_GEOMETRY
chvt 2
chvt 1
;;
startx)
echo "Starting startx:"
startx
;;
console)
rm -f /run/lock/started
exit ;;
rm -f /run/lock/started
exit ;;
esac
done
Updated:
- start.sh lock file
- auto reconnect wifi
Comments